-
 0
0

-
0


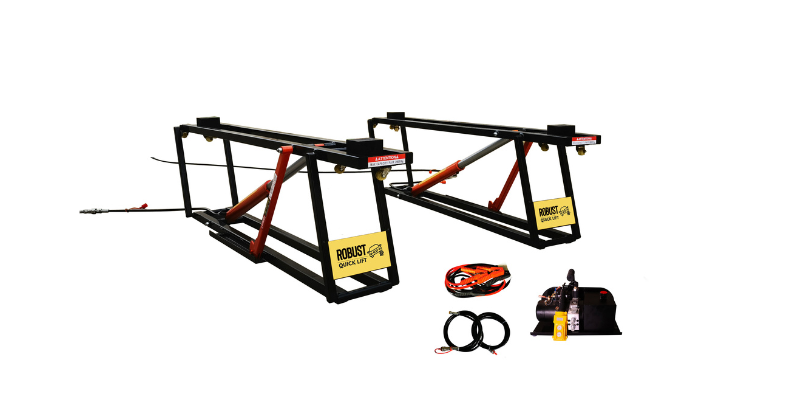
Lifting your vehicle with Robust Quicklift is designed to be fast, simple, and completely secure — whether you’re a weekend car enthusiast or a professional mechanic. Our hoists combine durable engineering with a user-friendly hydraulic system that makes setup and operation effortless.
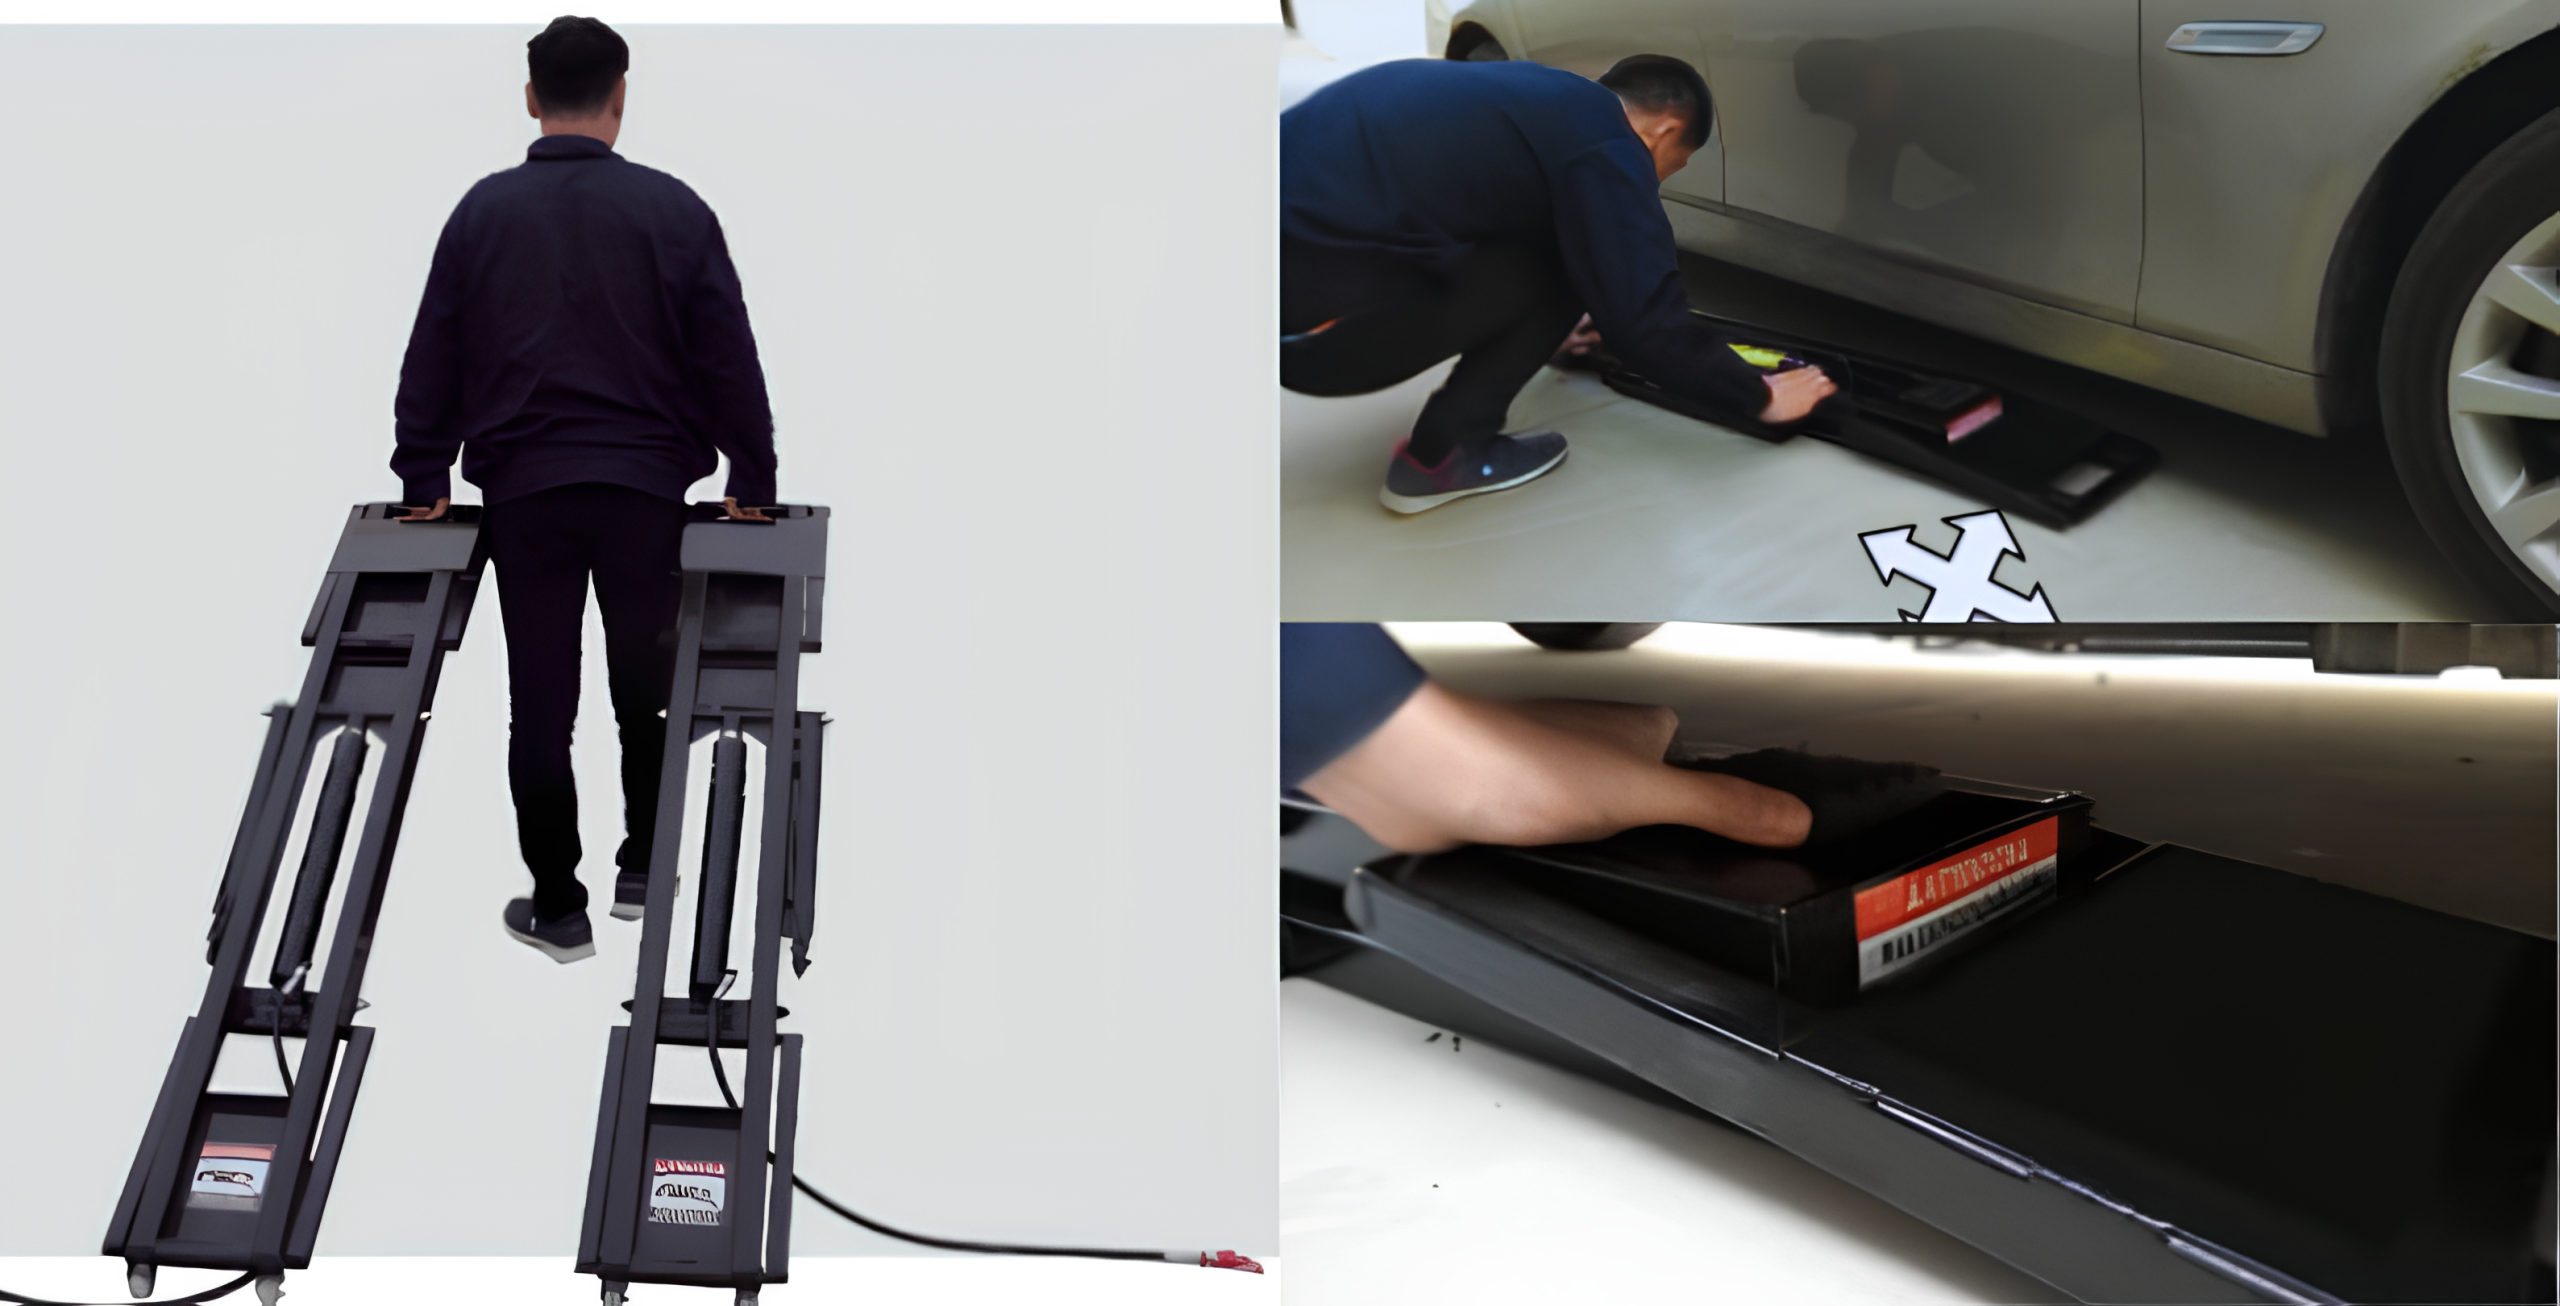
Robust Quicklift is built for convenience from the moment you unpack it. Simply roll out the frames, align them with your vehicle’s lift points, and connect the power unit — no bolts, or complicated installation required. The entire setup takes just minutes and can be done on almost any solid surface, indoors or outdoors. Whether you’re in your home garage or a professional workshop, Robust Quicklift is ready when you are.
With Robust Quicklift, lifting your car is as easy as pressing a button. The high-performance hydraulic system delivers smooth, even elevation, giving you full access to your vehicle’s underside for maintenance or detailing. When the job’s done, lower your vehicle smoothly and store the compact frames in seconds — ready for your next use.
Lifting your vehicle with Robust Quicklift is designed to be fast, simple, and completely secure — whether you’re a weekend car enthusiast or a professional mechanic. Our hoists combine durable engineering with a user-friendly hydraulic system that makes setup and operation effortless.
Watch The Official Robust QuickLift Setup Tutorial
STEP 1
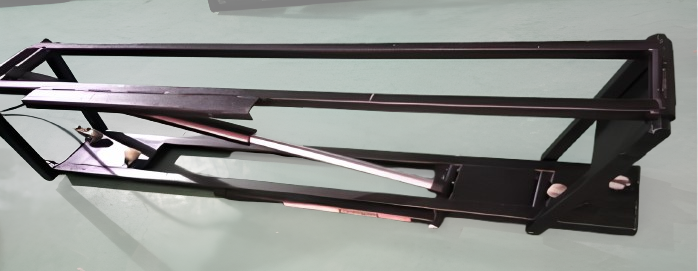
Disassembly and packaging
Open the package (the cutter should not scratch the surface coating, tubing and other parts of the machine), Take out the lifting frame and power unit and accessories.
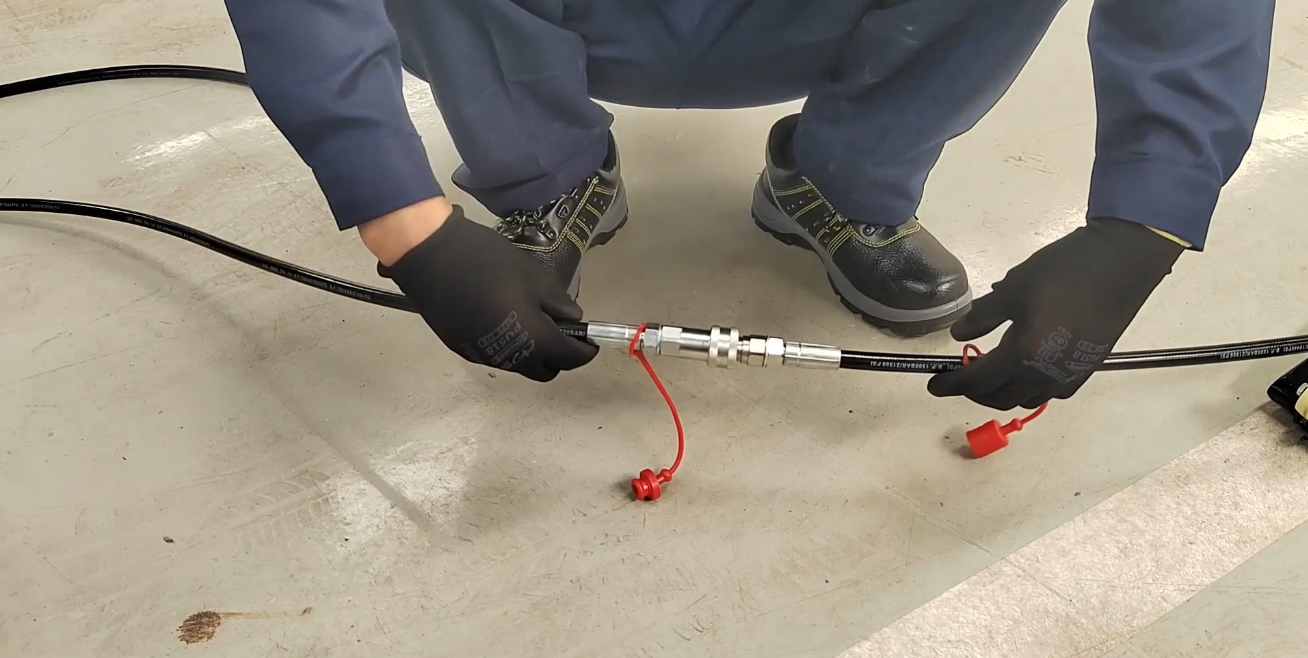
STEP 2
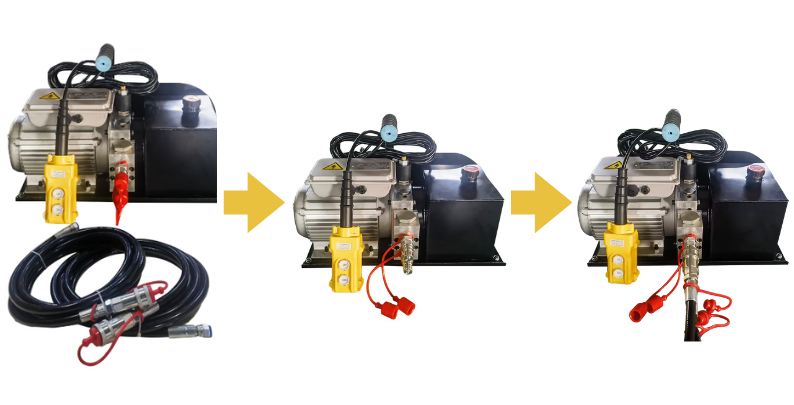
Connecting Oil Hose
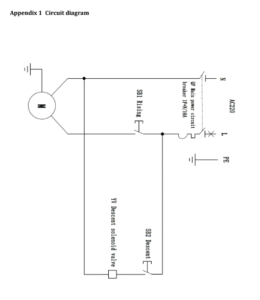
Connect the quick coupling of the 4M oil hose to the quick coupling on the power unit.
When connecting the oil hose for the first time, be aware that the installation space is limited, and you’ll need to use some force to securely attach the quick connectors of the oil hose and power unit. If you experience any oil leakage during this step, it’s usually due to the initial connection process, not a defect.
Watch here >
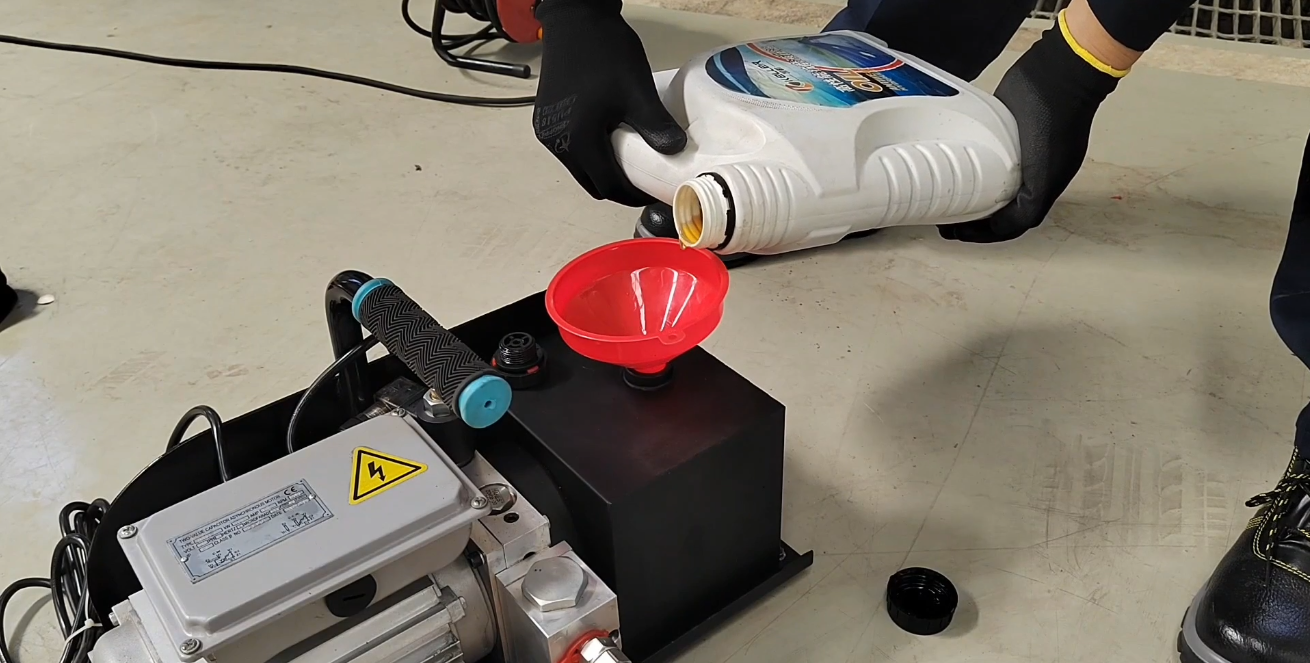
STEP 3
Filling with Hydraulic Oil
Open the oil tank cover and add hydraulic oil (4L anti-wear hydraulic oil)
STEP 4
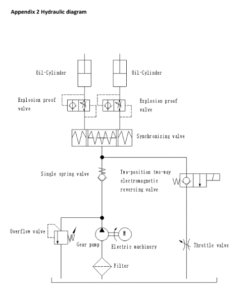
Preliminary use of exhaust
Connect the oil circuit between the lifting frame and the power unit
STEP 5
Turn the lift upside down
Turn the lift upside down, turn on the power unit, and insert the plug into 220V/50Hz socket.
STEP 6
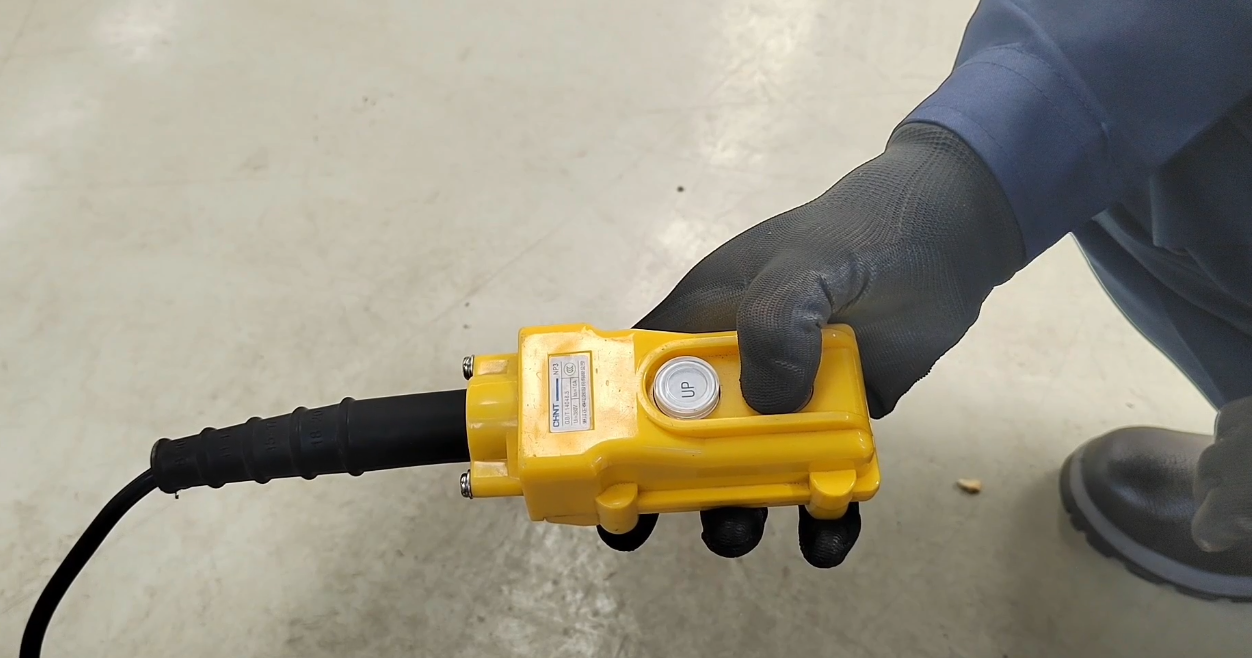
Discharging the gas
Press the “Up” button of remote control to rise to the top, press the “Down” button to fall to the ground, repeat 2 or 3 times, discharge the gas in the pipeline and its cylinder(no crawling state when the cylinder rises or
falls),and then turn over the lift.
Lifting your vehicle with Robust Quicklift is designed to be fast, simple, and completely secure — whether you’re a weekend car enthusiast or a professional mechanic. Our hoists combine durable engineering with a user-friendly hydraulic system that makes setup and operation effortless.
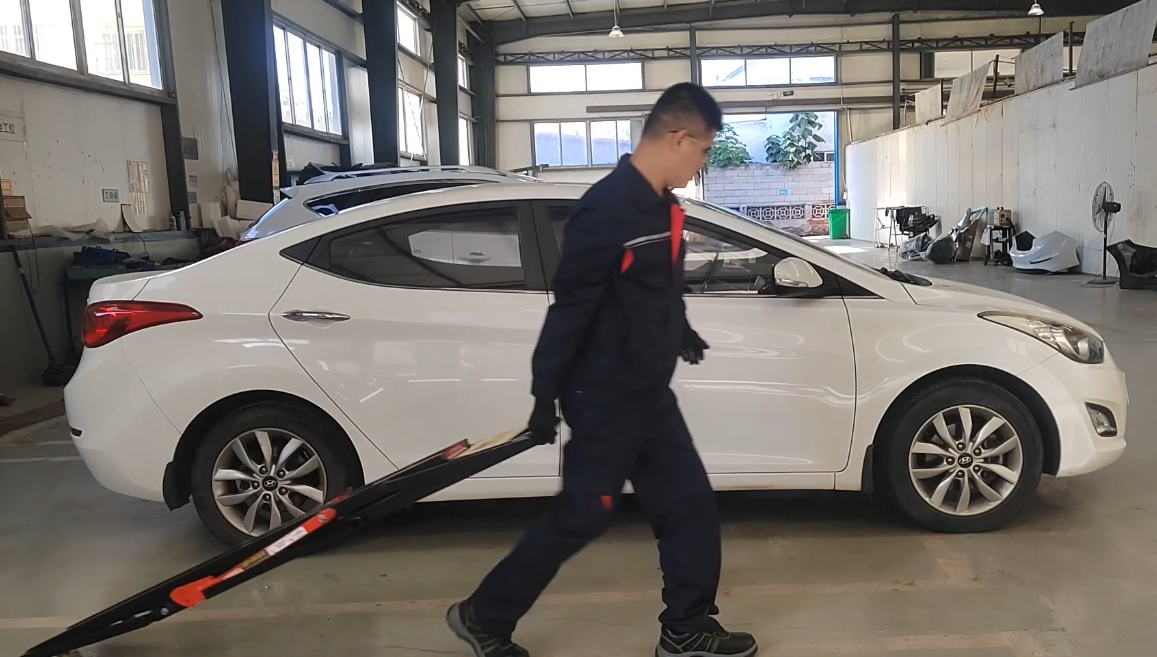
STEP 1
Place the lifting bracket
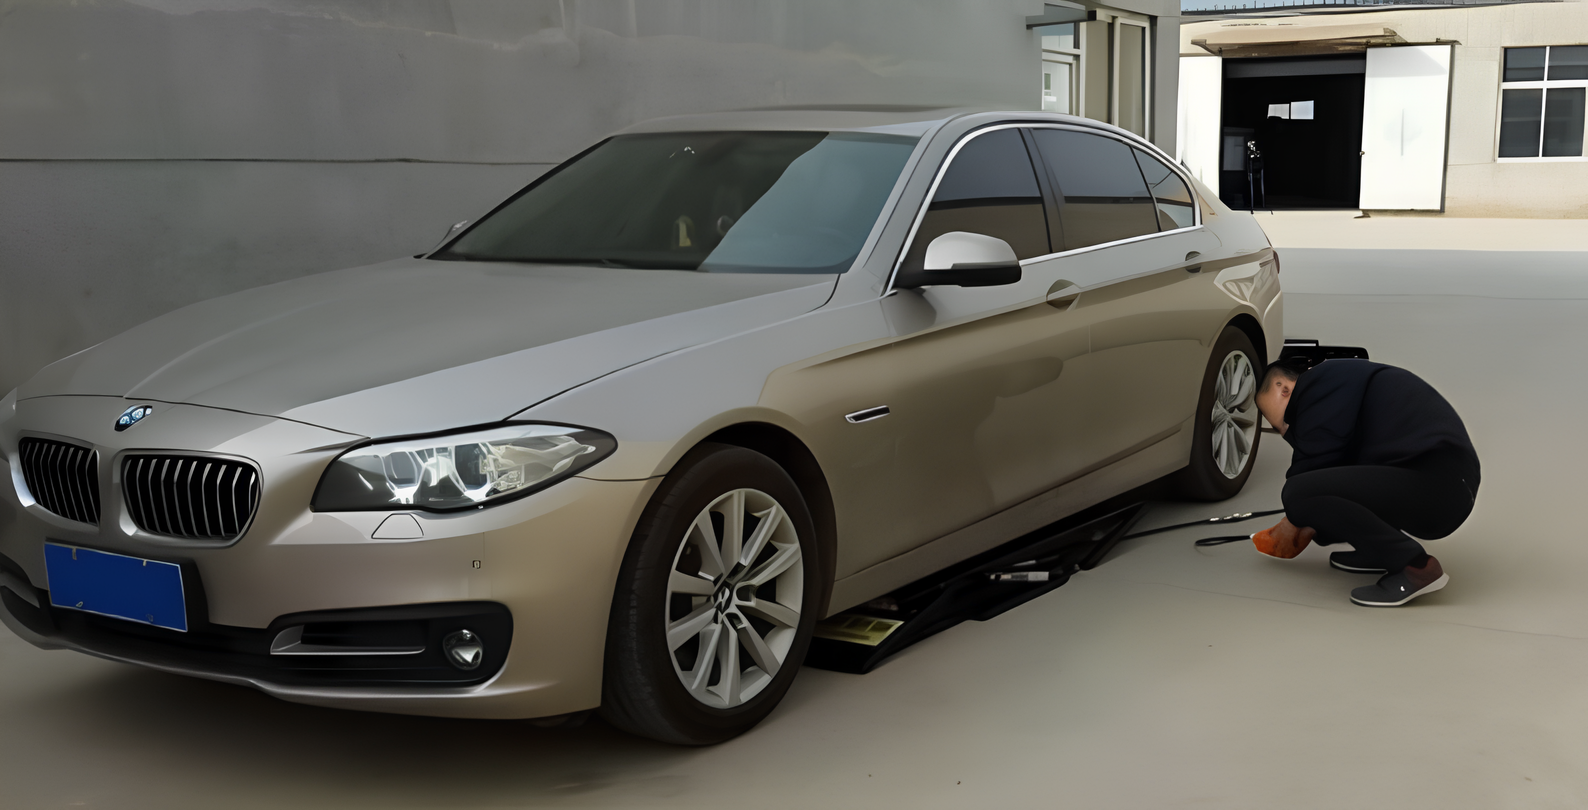
Drag the lift to both sides of the vehicle (no personnel in the car and no heavy objects on the side of the vehicle) to ensure that the safety lock lever of the lift is on the outside of the vehicle, which is convenient for personnel to operate. Move the lift to the underside of the vehicle skirt, adjust and determine the lifting position, try to ensure that the front, rear, left and right directions of the lifts are parallel, and put the rubber blocks.
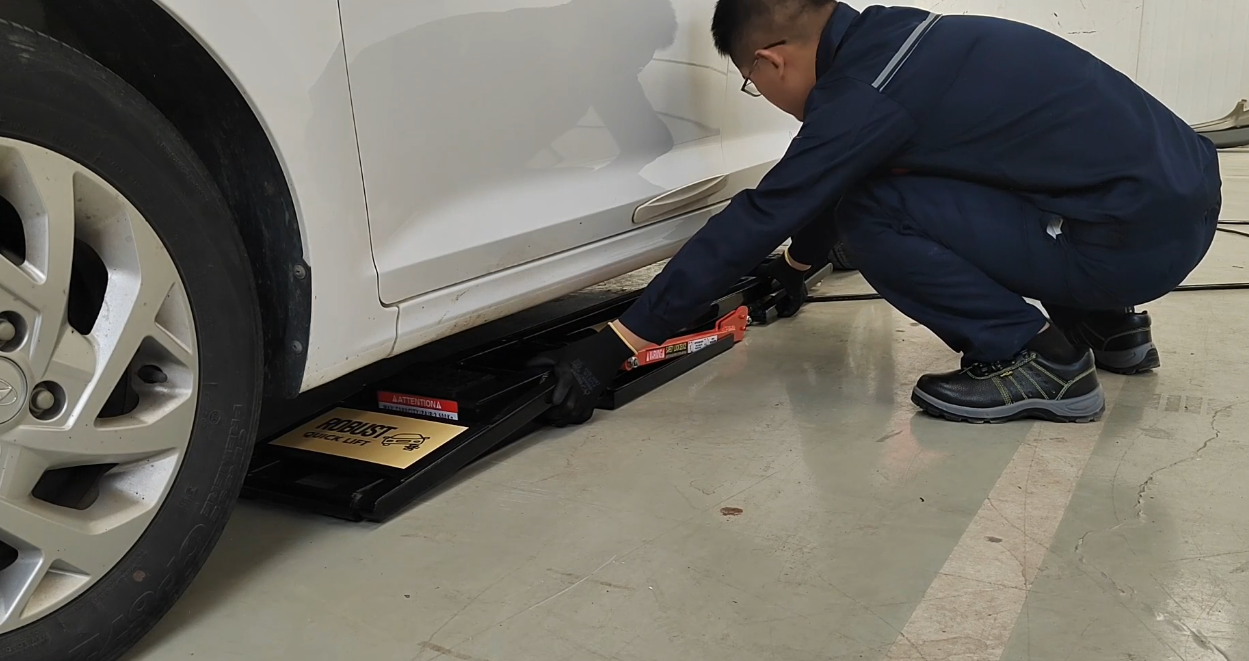
STEP 2
Positioning and Alignment
The bottom of the lifting frame is equipped with universal wheels, which can be pushed to the bottom of the vehicle from front to back, from left to right. Adjust the rubber pad to the lifting point
After confirming the position of the lifter and the vehicle, press the “Up” button on the remote control. Stop when the lifter is near the vehicle’s lifting point, then check and adjust the alignment between the contact pad and the lifting point again.
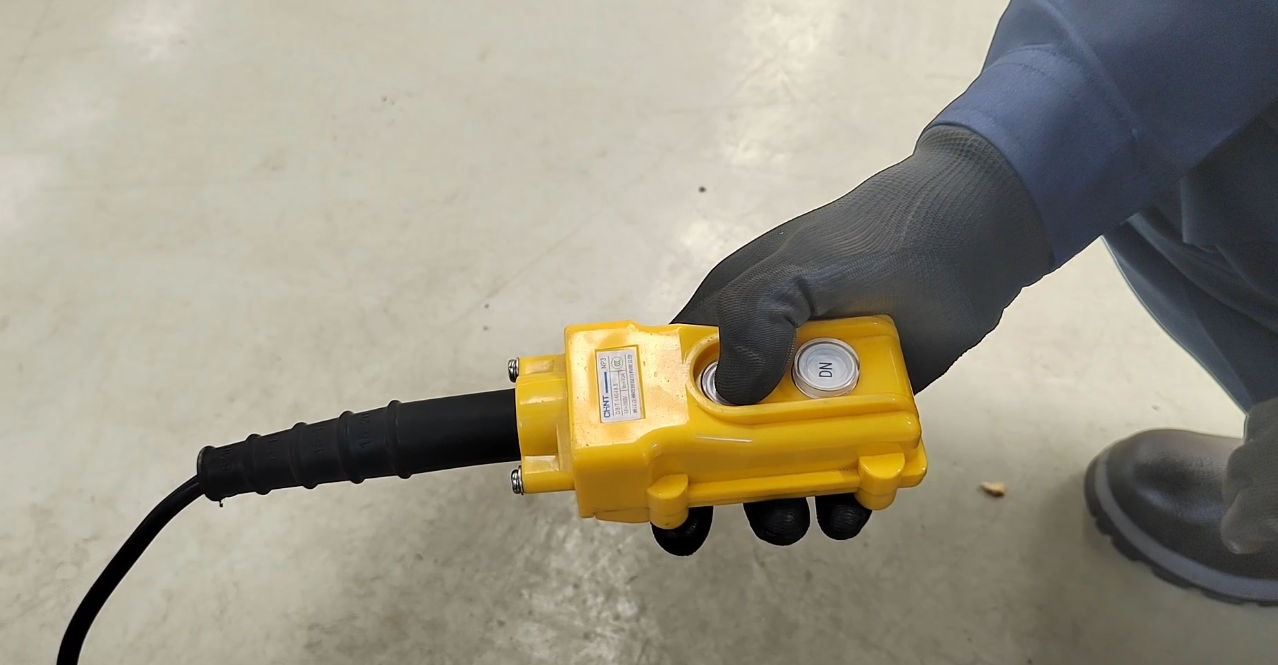
STEP 3
Raise and Secure the Lift
Press the “Up” button until the lifting platform reaches the full height position.
Press the “Down” button to fully lock the mechanical lock and start maintenance work
In this state, the lock teeth are in occlusal state.
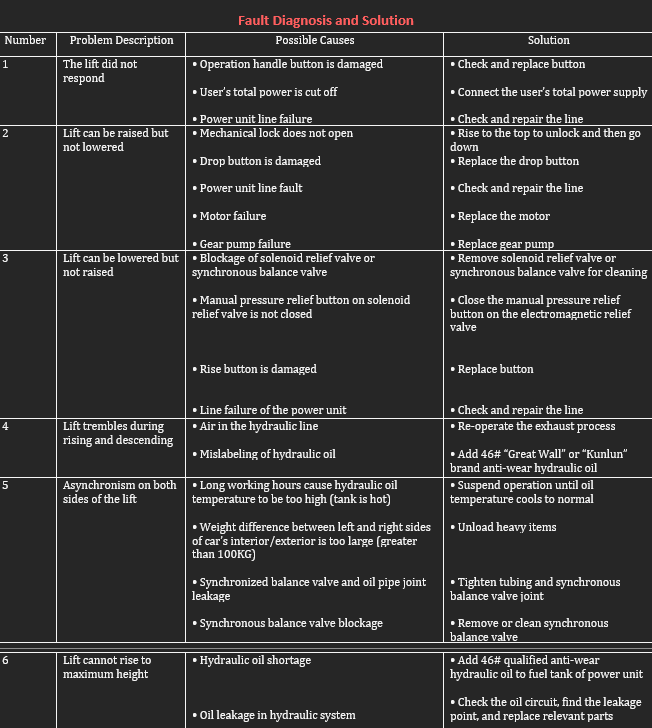
If the lift does not work properly, please check if the following problems exist in the lift. If the problems remain unsolved, call for technical support.
Note: Be careful! Only professionals can repair safety devices such as electrical.
Disposal of used oil
Used oil, which is removed from the power unit and the plant during an oil change, must be treated as a polluting product, in accordance with the legal prescriptions of the country in which the lift is installed.
Machine demolition
The machine must be demolished by authorized technicians, just like for assembling. The metallic parts can be scrapped as iron. In any case, all the materials deriving from the demolition must be disposed of in accordance with the current standards of the country in which the rack is installed. Finally, it should be recalled that for tax purposes, demolition must be documented; submitting claims and documents according to the current laws in the country in which the rack is installed at the time the machine is demolished.

Safe and Convenient Storage
Keep your Robust Quicklift frames organized however you like.
Wall Hangers set is made of solid steel. The load-bearing coefficients are designed at 150% of the maximum rated weight of the quick lift products.
The height to fix the wall hanger is the same as the length of the quick lift, the lower end of the quick lift is put on the ground which is easy and convenient for people to lift and hang the quick lift.
Fix the wall hanger on the wall with the attached
expansion screws. Make sure the expansion screws are tightened without loosening and
then put the quick lift on the wall hanger.

Safety Precaution
The lift has been designed and built for lifting vehicles and making them stand above level in a closed area any other use is forbidden. The distance between vehicle bottom with the ground should not be lower 110mm. When lowing down the vehicle, make sure the tire is tightened. Without loading, lifting is prohibited. The manufacturer is not liable for possible damages to people, vehicles or objects resulting from an improper or unauthorized use of the lift.
For operator and people safety, a square space for a safety area at least 1m free away from the lift must be vacated during lifting and lowering. The lift must be operated only from the operator’s control site in this safety area. Operator’s presence under the vehicle, during working, is only admitted when the vehicle is lifted and the safety lock is engaged.
Never use the lift when safety devices are off-line. People, the lift and the vehicles lifted can be seriously damaged if these instructions are not followed.